You ever stand there, holding your vacuum cleaner like it just revealed some kind of secret code, thinking, “Okay… now how the heck do I open this dust bag?” Yeah, that’s a situation that sneaks up on everyone. You’ve got crumbs from the last three weeks, maybe a sock that mysteriously disappeared, and dust that’s been plotting world domination inside that bag. And somehow, the bag’s got this… complicated little flap that looks like it’s meant for rocket science rather than cleaning your living room. Well, you’re not alone. I’ve spent more time than I care to admit fiddling with vacuum cleaner dust bags, poking at them like they’re puzzle boxes, and figuring out the quirks nobody bothers to explain.
Why Opening Your Vacuum Cleaner Dust Bag Feels Harder Than It Should
So here’s the deal: vacuum cleaner manufacturers have some sort of secret pact where the bags are deliberately fiddly. There’s flaps, clips, sometimes a slidey cardboard thing, and oh, the horror of the paper bag that rips if you even look at it wrong. Believe me, it’s not your fault. According to Consumer Reports, over 30% of homeowners admit they struggle with vacuum maintenance, especially dealing with dust bags. It’s easy to feel frustrated, but understanding the parts and their quirks makes it way less intimidating. Most modern vacuums have one of three main bag systems: paper bags, cloth bags, or hybrid bags with reusable liners. Knowing which one you’re dealing with before you yank on it like a mad person is step one.
Step-by-Step Guide to Open a Paper Dust Bag
Paper dust bags are probably the trickiest. They’re cheap, effective, but fragile, and they’re meant to be thrown away after use.
- Turn Off and Unplug – Yeah, obvious, but you’d be surprised how many times people skip this part. You don’t want dust flying everywhere or worse, electric shock.
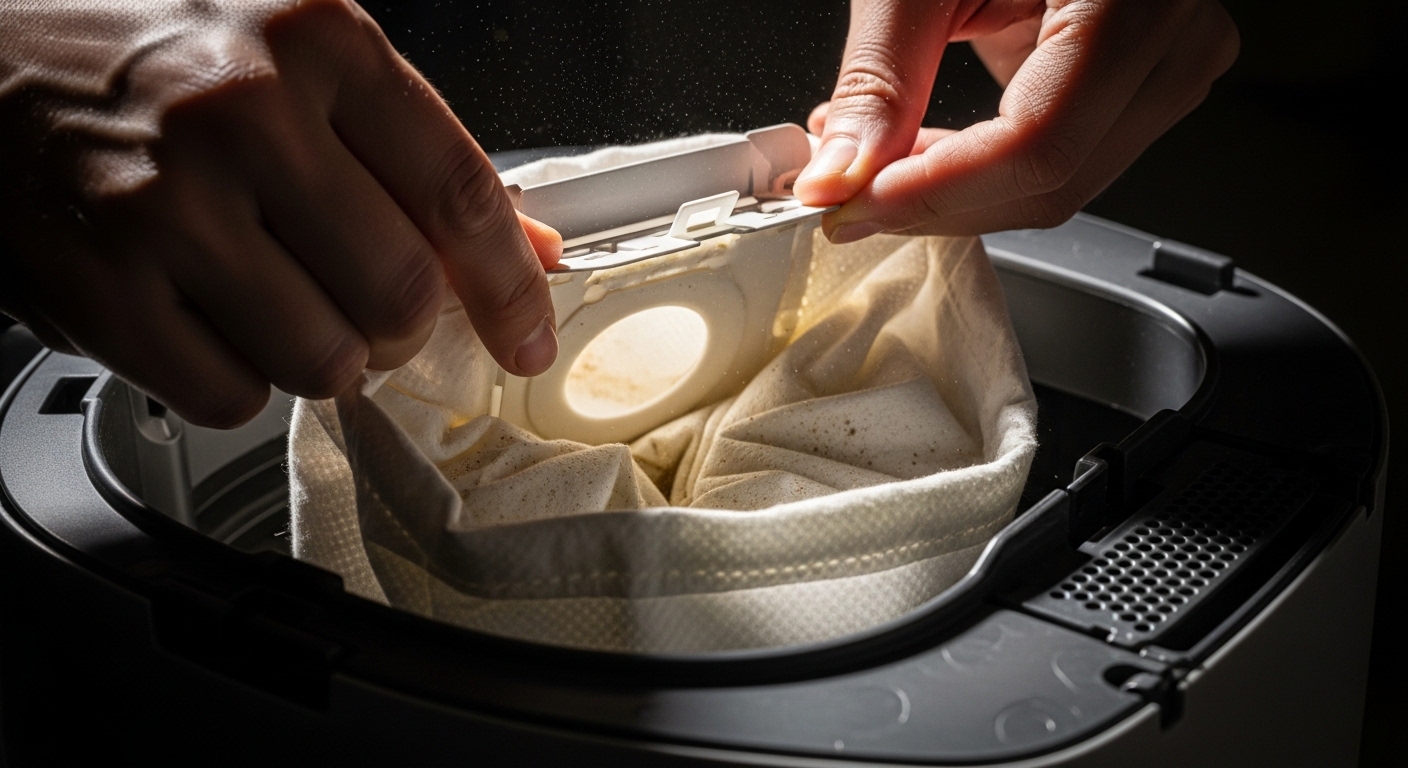
- Locate the Bag Compartment – Usually behind a front panel or the top cover. Some models like the old Hoover or Eureka styles have a latch or button; others you just kind of pull the cover off.
- Identify the Seal Mechanism – Paper bags usually have a cardboard collar with a round opening. Some have a sliding plastic tab that keeps dust from escaping. You gotta look closely; it’s sneaky.
- Carefully Pull the Bag Out – Hold it by the collar, not the bag itself. If you squeeze the paper part, dust explodes like confetti at a wedding.
- Open the Flap or Tab – Some paper bags fold over; some have a little hook. Slowly move it and pay attention to how it’s attached. It’s tempting to rip, but gentle wins here.
A pro tip I learned the hard way: never shake the bag over the trash can unless you really want a cloud of fine dust in your face. Wear a thin glove if you’re squeamish about touching old dust; it’s not glamorous, but hey, it keeps your hands clean-ish.
Cloth Bags: Reusable but Tricky
Cloth bags are forgiving, but they have their own quirks. They’re usually made of thick fabric, sometimes with a zipper or a Velcro seal. Here’s what to do:
- Detach Carefully – Cloth bags are often attached with a ring that slips over a nozzle or clip. Wiggle gently, don’t yank.
- Inspect the Opening – Unlike paper bags, these may have zippers, snaps, or Velcro. Some manufacturers include a little flap that tucks inside to prevent dust leakage; it’s easy to miss.
- Empty Without Creating Chaos – Most people just shake it, but some bags have a double compartment. Tip them into a garbage bag slowly.
- Check for Damage – Cloth bags last longer but wear over time. Look for holes, tears, or fraying seams. A tiny rip today becomes a dust storm tomorrow.
Cloth bags can be machine-washed depending on brand. Miele, for instance, recommends washing every few months, which is kind of a life-saver for allergies.
Hybrid Bags and Modern Innovations
Some modern vacuums, especially canister types, use a hybrid bag or liner system. These are like cloth-paper mashups. You open them almost like a drawstring pouch or unzip a compartment. The key here is orientation: some bags will only fit one way, and forcing them can rip the liner or break the flap.
- Always check the user manual. Yes, I know manuals get dusty in a drawer, but they actually save you from a frustrating five-minute puzzle.
- Look for color-coded indicators. Many modern models have red tabs, arrows, or shapes that guide you.
- Never cut the bag open to “get more capacity.” It sounds tempting when it’s full, but it’s a one-way ticket to a mess.
Common Mistakes People Make
Here’s where most people go wrong:
- Ripping the Bag – Usually because they try to pull it out too fast. Slow motion, friend. Slow motion.
- Not Checking for Locking Mechanisms – Those little flaps exist for a reason. They prevent dust explosion.
- Emptying Outside a Container – Dust literally floats everywhere. Trash cans are good; open windows even better.
- Mixing Bag Types – Not all vacuums accept the same bags. Using the wrong one can block airflow, reduce suction, or even damage the machine.
Tips to Make Opening Dust Bags Easier
Here’s a cheat sheet from someone who’s fought with hundreds of bags:
- Always keep gloves handy. They save your nails and sanity.
- Tap the bag gently before removal; dust settles a bit.
- Store spare bags near the vacuum, but away from moisture. Damp bags are impossible to open without tearing.
- Label reusable cloth bags if you have multiple vacuums; it avoids confusion.
- Take photos of how the bag fits before removing. Yes, it sounds silly, but next time you’ll thank yourself.
Real-World Example: My Eureka Disaster
I once tried opening a paper bag on a Sunday morning—big mistake. It was full, slightly damp from a spilled cup of coffee I missed last week, and it exploded like a glitter bomb. Dust EVERYWHERE. My advice: learn from my mistakes. Slow hands, steady fingers, gloves, and maybe a mask if you have allergies. That one afternoon I spent cleaning up the mess took longer than a regular vacuum session.
When to Replace the Dust Bag
This is simple but often ignored. A bag that’s too full reduces suction, strains your motor, and makes vacuuming ineffective. Look for these signs:
- Bag feels stiff or bloated.
- Reduced suction even on maximum power.
- Dust escaping from flaps.
- Any tears or holes.
Paper bags are usually single-use. Cloth bags last longer but inspect monthly. Hybrid liners might last months depending on frequency of vacuuming.
Conclusion
Opening a vacuum cleaner dust bag isn’t rocket science, but it does demand patience, a bit of know-how, and respect for the dust you’re about to unleash. Once you figure out your model’s quirks, it becomes second nature, but rushing it or ignoring the little flaps is how disasters happen. Take it slow, follow the flaps, use gloves if you need, and treat the bag like a delicate artifact rather than a disposable container. Your future self—and your living room—will thank you.
After all, a clean house starts with understanding the small things, even if it’s just how to open vacuum cleaner dust bag without creating a dust apocalypse.
This guide should leave you feeling less intimidated, a bit wiser, and ready to tackle your vacuum like a pro, one carefully opened bag at a time.
Would you like me to also create an SEO-friendly meta description and suggested subheadings for this post? It can help boost its visibility online.