Ugh, so your vacuum cleaner’s running, making all the usual racket, but it’s barely picking up a crumb on the floor, huh? You’re pushin’ it back and forth, thinking maybe it’s you, but nope…something’s def wrong. I’ve been there, you know, standing over a stubborn vacuum that looks alive but sucks…well, nothing. Let’s talk about how to fix a vacuum cleaner with no suction, and I mean the kinda tips that actually save your sanity rather than just repeat the usual “check the plug” nonsense.
Why Your Vacuum Might Suddenly Stop Sucking
Sometimes the problem isn’t dramatic, like the motor exploding, it’s subtle, sneaky stuff. Like, lint slowly choking the hose, dust creating a little dam in the bag, or something that seems tiny but really messes up the airflow. The first thing to do is stop stressing and actually look at the vacuum like a detective.
- Clogged hose or wand: Most people never even pull these apart. You’d be shocked how often a tiny bit of hair or string can block everything.
- Full or improperly seated bag/canister: Even if it looks empty, sometimes the dust just forms a crust on the walls, cutting airflow.
- Dirty or broken filters: HEPA, foam, sponge – they all get nasty and reduce suction if neglected.
- Brush roll issues: If the brush roll is jammed or spinning wrong, it can feel like the vacuum isn’t sucking at all.
Here’s a quick stat for you: According to a survey by Consumer Reports, almost 40% of vacuum malfunctions are caused by blockages or filter issues, not motor failures. So don’t panic thinking the motor is fried.
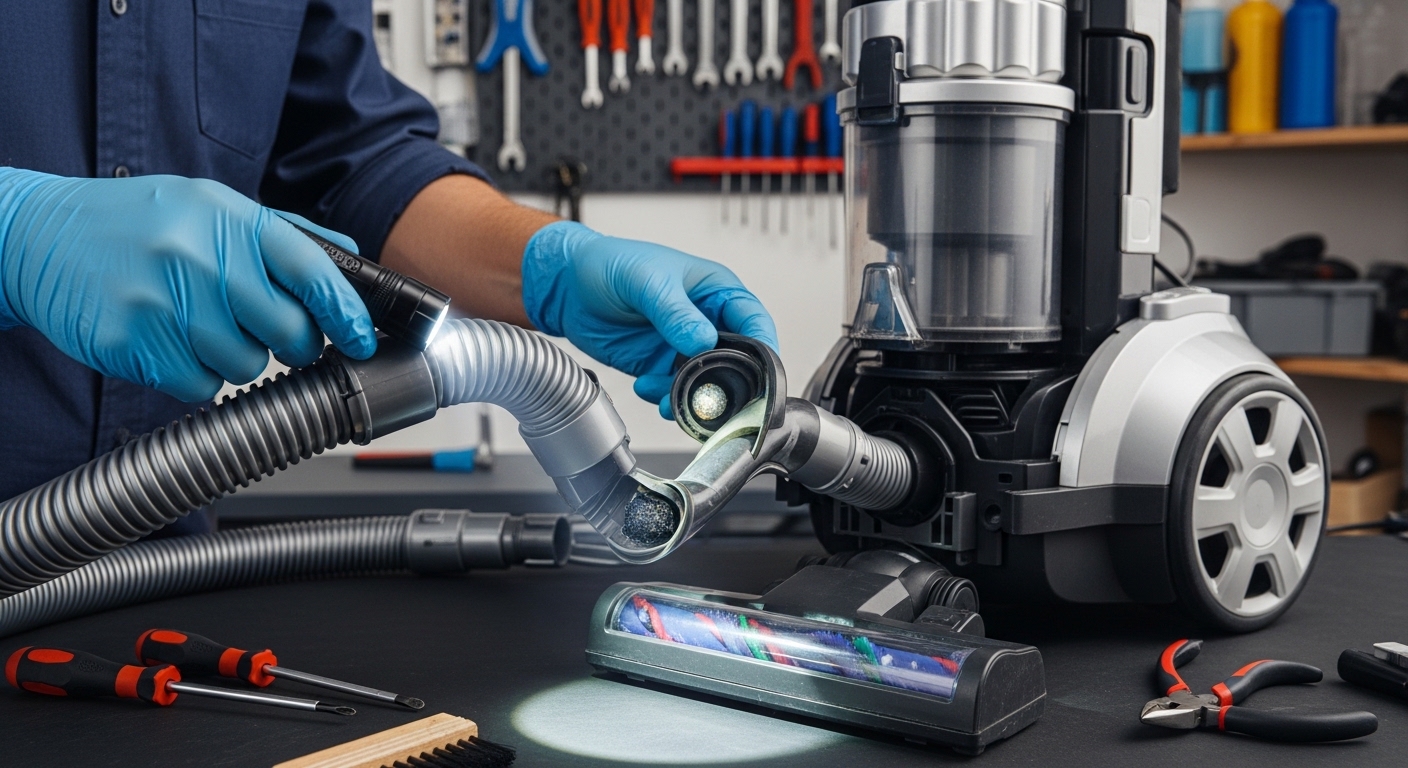
Step-By-Step Inspection Before You Panic
Before you go buy a new vacuum, do a proper once-over. Here’s what I usually do:
- Unplug and detach everything – hose, wand, canister.
- Look through the hose – sometimes you need a flashlight. If you see a hairball or dust chunk, pull it out carefully with pliers.
- Check the brush roll – strings, hair, threads wrap around it like it’s a little jail. Remove all of it.
- Inspect the filters – rinse them if they’re washable or replace if they’re not. Most brands like Hoover, Dyson, Shark – they all have some form of filter you can’t ignore.
- Check the bag or canister – empty it completely, wipe down the sides. Crusty dust can block suction more than you’d think.
It may sound simple, but a lotta people skip step 2. Seriously, a hose jammed with 2 inches of dust can make it feel like your vacuum is just a fancy paperweight.
Cleaning vs Replacing Parts: When to Do What
Not everything needs to be tossed. But here’s the tricky part – sometimes a part looks fine but is subtly broken.
- Filters: If your filter is discolored, rigid, or torn, just replace it. Washable ones are usually good for a few months.
- Hoses: Small punctures or cracks reduce suction dramatically. You can patch tiny holes with duct tape for a temporary fix.
- Brush roll: Bent, broken, or missing bristles? Replace. Clean bristles only do so much.
- Belts: Many vacuums have a belt that spins the brush roll. If it’s loose or snapped, suction seems weak even though the motor is fine.
A tip here: Keep a few spare belts and filters at home if you’re serious about cleaning. Makes troubleshooting way faster.
Testing Suction Properly
Here’s where many people mess up: They just turn the vacuum on and wave it over a rug. That’s not testing suction.
- Finger test: Put your finger over the hose opening. You should feel strong pull. Weak pull means block somewhere.
- Paper test: Hold a piece of paper over the nozzle; it should stick if suction is normal.
- Spot check: Run the vacuum over a known messy area. If crumbs barely move, you still got a problem.
Remember, weak suction isn’t always visible. Tiny leaks in the hose or misaligned parts reduce airflow without obvious signs.
Commonly Overlooked Problems
You cleaned everything and it still sucks (literally). Here’s some sneaky stuff to check:
- Air leaks in attachments: Sometimes the wand or hose connector is cracked. Even small gaps kill suction.
- Motor brushes worn out: These are little carbon blocks inside the motor. When worn, the motor hums but barely works. Replacement is cheap but fiddly.
- Excessive heat shutoff: Some modern vacuums throttle suction if they overheat. Could be a clogged filter or motor problem.
Quick Fixes You Can Try at Home
Alright, let’s get to the fun part – fixes that don’t need a repair shop:
- Clean everything thoroughly – hose, wand, canister, brushes, filters. Seriously, do it again if needed.
- Check the belt – replace if cracked, frayed, or loose. A loose belt is like trying to ride a bike with a broken chain.
- Seal minor hose cracks – duct tape, silicone tape, or even a rubber sleeve can temporarily restore suction.
- Replace filters – even if they look kinda clean, old HEPA filters really choke the airflow.
A weird trick: If your vacuum has a bag and a canister at the same time (some hybrids), remove the bag and run it with just the canister. Sometimes the bag restricts airflow more than you’d expect.
When to Call a Professional
If you’ve done all of the above and it still barely sucks, it might be time to admit defeat. Some issues are too technical:
- Motor failure
- Internal electrical problems
- Complex belt/gear assemblies inside the motor head
Most local repair shops can fix these for a fraction of a new vacuum. And honestly, it’s better than buying a whole new unit for a $50 fixable issue.
Maintenance Tips to Prevent Future Suction Loss
Once you get your vacuum back to full power, don’t let it go downhill again. Here’s a maintenance cheat sheet:
- Empty canisters/bags often – even half-full reduces suction.
- Wash or replace filters every 2-3 months depending on usage.
- Check brush rolls and hoses monthly – remove hair and debris.
- Don’t overheat – long sessions on thick carpet? Pause and let it cool.
- Store properly – bent hoses or twisted cords can cause leaks or wear.
Small effort now prevents the “oh crap, vacuum sucks again” moment.
Wrapping It Up
Fixing a vacuum cleaner with no suction isn’t rocket science, but it does need patience, a little detective work, and sometimes fiddling with small parts. Most of the time it’s just a clog, a crusty filter, or a jammed brush roll. Take your time, follow the steps above, and you’ll probably save yourself a new vacuum purchase and a whole lotta frustration.
Your vacuum doesn’t need to stay weak forever. With a few minutes, some careful inspection, and maybe a spare belt or filter, you can bring it back from the brink of uselessness to the full-on dirt-devouring machine it’s meant to be. And hey, once you figure it out, you might even impress yourself a little with your handyman skills.
Would you like me to also create a table comparing common vacuum issues vs cost to fix vs DIY difficulty for this article? It could make it even more user-friendly.