Man, sometimes you’re zipping around the living room with your Shark vacuum cleaner, thinking you’re finally getting on top of the mess, and then… bam. Suction’s gone, weird smells are creeping in, and you’re staring at a machine that looks like it survived a dust apocalypse. If you’re here, you probs know exactly what I’m talking about. Learning how to clean a Shark vacuum cleaner properly is kinda like giving it a spa day—except it’s more about disassembling, rinsing, and not electrocuting yourself.
Why Your Shark Needs Some TLC
Look, vacuums aren’t magical. Even the fancy Shark models that promise “never losing suction” can get clogged. Hair wraps around the brush roll, dust accumulates in filters, and suddenly, what once sucked like a champ feels like it’s sucking… well, barely. According to Consumer Reports, about 65% of vacuum malfunctions come from neglected maintenance. Yeah, that means a lot of people just throw their vacuums in a corner instead of giving them a proper clean.
Not cleaning your Shark regularly can make it wear out faster, smell weird, and in some cases, trip the internal safety switches. You don’t want that. Plus, let’s be real, nobody wants a vacuum blowing dust back onto the floor.
Tools You’ll Probably Wanna Have
Before you start dismantling your Shark like it’s a Rubik’s cube, grab some stuff:
- Scissors or seam ripper (for hair and string wrap)
- Soft brush or old toothbrush
- Warm water and mild dish soap
- Clean microfiber cloths
- Replacement filters if yours are trashed
- Screwdriver (if you have a model with screws on the brush roll)
Honestly, having everything in arm’s reach makes the whole process way less of a headache. Nothing worse than getting the filter out and realizing you need to go hunt for soap while dust flies everywhere.
Step 1: Unplug and Prep
This might sound obvious but do not skip it. I’ve seen people “quickly” clean their vacuums while it’s still plugged in… yeah, don’t do that. Safety first. Once it’s unplugged, find a big enough table or floor space because you’re about to take apart parts that somehow manage to get dust everywhere.
Take off the dust cup first. Most Shark vacuums have a button you press and the cup pops out. Empty that baby into a trash can and give it a rinse with warm water. Some folks even add a tiny bit of dish soap—just make sure you rinse it super well. You don’t wanna leave soap residue; your vacuum will smell like a dish sponge the next time you use it.
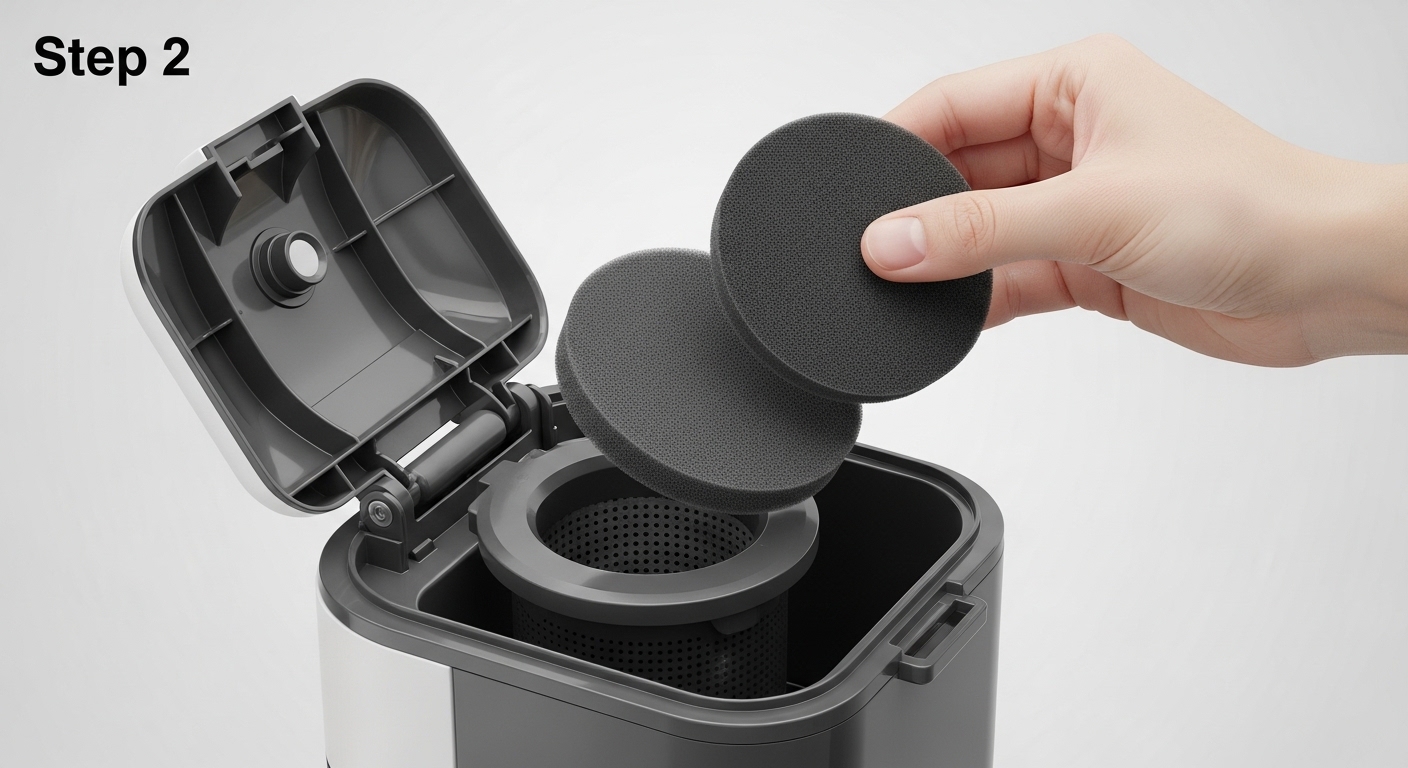
Step 2: Filters – The Unsung Heroes
Shark vacuums usually have two filters: a foam filter and a felt/hepa filter. These things get gunked up fast. Pull them out and check for caked-on dust.
- Foam filter: Usually washable. Rinse under lukewarm water until the water runs clear. Don’t squeeze too hard; you’ll tear it.
- HEPA/felt filter: Check your manual, some can be washed, others can’t. If yours are non-washable, give them a gentle tap over a trash can to knock dust loose.
Pro tip: Let everything air dry for at least 24 hours. I know it’s tempting to slap it back in while damp. Don’t. You’ll end up with moldy smells and a soggy mess.
Step 3: Brush Roll – Hair’s Worst Enemy
The brush roll is where hair, string, and mystery fuzz go to die. Removing hair from it is kinda gross but satisfying.
- Lay the vacuum on its side and detach the brush roll. Most Shark models have a small latch or screws.
- Use scissors to carefully cut wrapped hair along the bristles. Don’t slice the bristles or belt.
- Wipe down the brush roll with a damp cloth.
Some people use tweezers for stubborn hair. Honestly, whatever works. The key is to remove everything that might stop it spinning freely.
Step 4: Check the Hose and Other Passages
This is the sneaky part most people skip. Hoses can get clogged, especially if you vacuum up small toys or that rogue sock from under the couch.
- Detach the hose and look through it.
- Shine a flashlight if you have to.
- Use a flexible brush or even a broom handle wrapped in cloth to gently push debris out.
If your Shark has removable extension wands, give them a quick rinse if they’re detachable. Dust loves to cling inside.
Step 5: Reassembly
Once everything’s dry, it’s basically putting a puzzle back together.
- Reinsert the filters carefully.
- Pop the dust cup back on.
- Slide the brush roll back in.
- Make sure hoses and wands click in properly.
Before turning it on, double-check there’s nothing loose inside. The last thing you need is a brush roll flying off mid-vacuum.
Maintenance Tips to Keep Your Shark Happening
You can make this whole deep-cleaning thing way less painful by doing a few mini-tasks regularly:
- Empty the dust cup after every vacuuming session.
- Check the brush roll weekly for hair.
- Tap out the filters every month even if they’re not visibly dirty.
- Avoid vacuuming up liquids or large debris that could clog the system.
Shark recommends replacing the filters every 3–6 months depending on usage. Think of it like brushing your teeth—you can skip a day, but over time, it’s gonna matter.
Common Mistakes People Make
- Rinsing non-washable filters. Bad idea. Smelly disaster.
- Using hot water on foam filters. They shrink.
- Forgetting to dry filters completely. Mold city.
- Overlooking the hose. That sock or dust boulder could be the culprit of weak suction.
It’s a bit annoying, but taking the time to do it right makes your Shark last way longer.
Signs Your Vacuum Needs a Deep Clean
- Loss of suction
- Strange noises (brush roll stuck)
- Bad odors while vacuuming
- Dust escaping back into the room
If you notice any of these, don’t wait. A clean Shark is a happy Shark.
Real-World Example
I have a friend, Sarah, whose Shark just stopped working after a year of regular vacuuming. She kept blaming the machine, but turns out a tiny sock had lodged in the hose for months. Once she cleaned it properly and replaced the filters, it worked better than the day she bought it. That’s the power of a good cleaning.
Final Thoughts
Cleaning a Shark vacuum cleaner isn’t rocket science, but it does take a bit of patience and knowing where the trouble spots are. Think of it like grooming your pet—you’ve gotta do it regularly or things get messy fast. Once you’ve got the process down, it’s kinda satisfying, watching a machine you depend on finally run like it should.
Remember, safety first, filters dry, hair out, hoses clear, and your Shark will reward you with strong suction and longer life. Treat it like a small investment in clean floors and a less stressful vacuuming experience.