Man, you ever notice how your Shark vacuum cleaner suddenly sounds like a dying whale or just stops picking up the crumbs you swear were there five minutes ago? Yeah, I’ve been there too. Figuring out how to clean Shark vacuum cleaner stuff can feel like you’re trying to solve some weird puzzle that’s part science, part dark magic. But don’t panic, we’re gonna break it down step by step, and I promise it’s way easier than you think, even if your vacuum’s looking like it’s been through a food fight apocalypse.
Why Cleaning Your Shark Vacuum Matters
So, here’s the thing, people usually ignore cleaning the vacuum until it’s a full-on horror show. But Shark vacuums, like most modern machines, they work best when the airflow is clear and the brushes aren’t tangled with literally every fiber in your house. One stat I read somewhere (don’t quote me on the exact number, but it’s legit) said clogged vacuums can lose up to 60% of their suction. That’s like paying a hundred bucks for a glorified paperweight that moves crumbs around instead of sucking them up.
Plus, there’s the whole hygiene factor. You know those smells that sometimes sneak out? Yeah, that’s trapped dust, hair, maybe even some mystery crumbs that have been marinating for weeks. Cleaning your Shark vacuum isn’t just about efficiency, it’s literally about keeping your home smelling… not like a swamp.
Tools You’ll Need
Before you start poking around, it helps to gather your arsenal:
- A soft brush – like a toothbrush, yeah the thing you ignore for flossing too.
- Scissors or seam ripper – to deal with hair and string that get wrapped around brushes.
- Warm water – nothing fancy, tap water works fine.
- Mild dish soap – optional but helps with sticky grime.
- A microfiber cloth – for wiping dust from the body.
Having all this ready makes the cleaning process way less “ugh” and more “okay I got this.”
Step 1: Unplug and Detach
This may seem obvious, but seriously, don’t be that person who starts yanking cords around. First thing, unplug the Shark vacuum cleaner. Then, take off the dust cup and filter. Most Shark models have a button or a latch – it’s usually kinda stiff so don’t panic if it feels like you’re breaking it. Pro tip: check your model’s manual if the filter feels stuck; some of them click out differently than others.
Step 2: Empty the Dust Cup
Look, I know this sounds painfully obvious, but just dumping out the dust cup isn’t enough. Shake it gently over a trash bin and use your brush to get out stubborn dust bunnies clinging to the edges. If your dust cup is washable (most Shark models are), rinse it with warm water and mild soap. Let it air dry completely before putting it back, or you risk soggy dust clumping later.
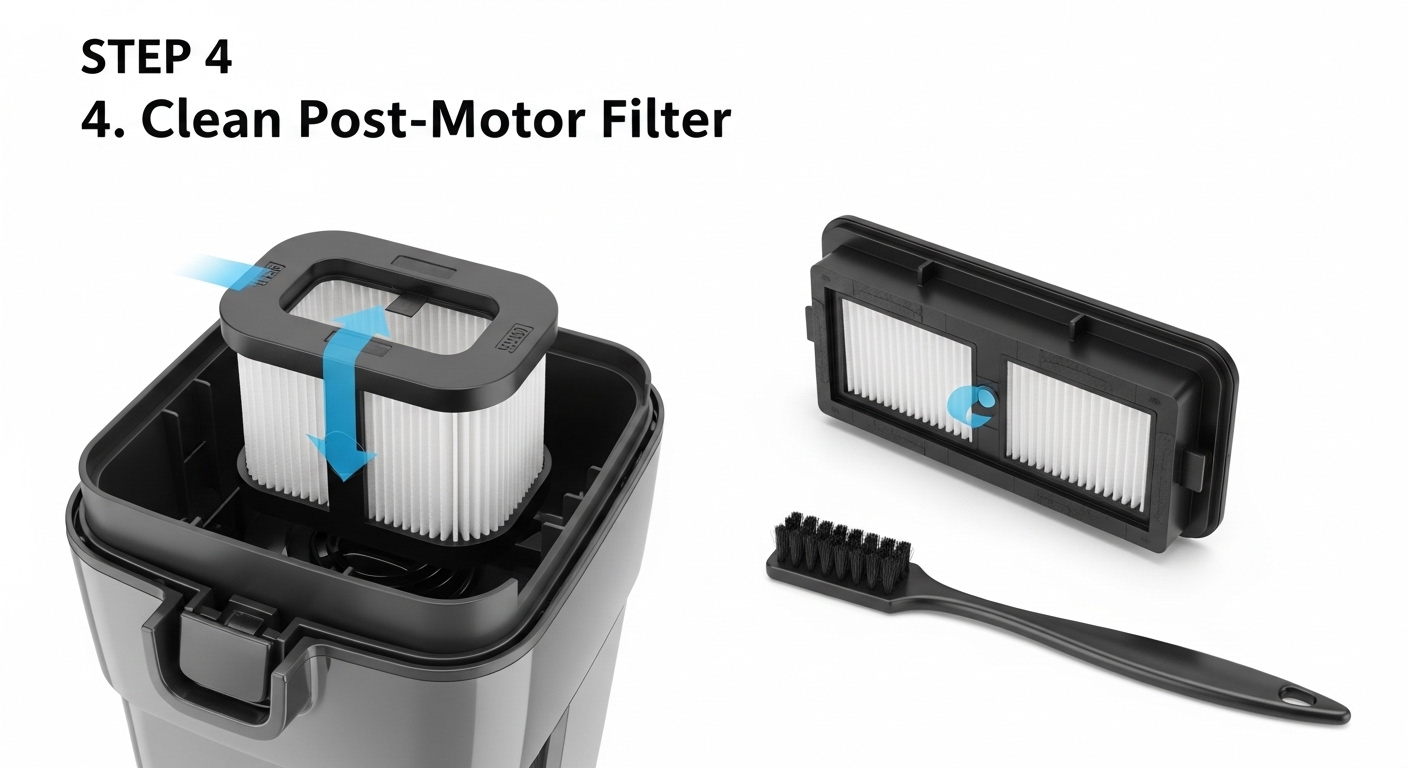
Step 3: Clean the Filter
This is where a lot of people mess up. The filter’s like the lungs of your vacuum – if it’s gummed up, everything else struggles. Most Shark vacuums have a foam filter and a felt filter:
- Foam filter – rinse under warm water. Don’t use soap unless the manual says so. Squeeze gently, don’t twist it like a wet towel.
- Felt filter – tap it gently to remove dust, or rinse if the manual allows. These sometimes take longer to dry, so don’t rush it back in.
Tip: replacing filters every 3–6 months can make a world of difference in suction and longevity.
Step 4: Brush Roll and Beater Bar
Alright, here’s the fun part that makes most people groan. Hair, string, and who-knows-what can wrap around the brush roll. Remove it carefully, then use scissors to cut any tangles. Don’t just yank, you could break the brush. Some Shark models have a removable beater bar – if yours does, take it out, wash it, and let it dry. If it’s not removable, a brush or cloth does wonders for surface cleaning.
Fun fact: even tiny hair wraps can reduce suction noticeably. It’s crazy how a little tangle can make your $200 vacuum act broke.
Step 5: Hose and Attachments
Most people forget about hoses and attachments. Check for blockages by shining a flashlight through the hose. If you see anything, push it out with a broom handle or a long stick (soft tip, don’t scratch the hose). Wipe down attachments with a damp cloth. This keeps airflow smooth and prevents your vacuum from wheezing like it’s dying mid-clean.
Step 6: Wipe the Exterior
Don’t forget about the outside. Dust and grime build up on the handle, body, and wheels. Use a microfiber cloth dampened with water or mild soap solution. Make sure buttons and vents are clean too – dust loves to hide there.
Step 7: Reassemble and Test
After everything’s dry (seriously, don’t rush this), pop all the parts back together. Plug it in, turn it on, and listen to that beautiful, strong suction hum. You might notice it even picks up stuff you thought was “too stuck” before. That’s the reward for all your patience and tiny scissor cuts in tangled hair.
Maintenance Tips to Keep It Running Smooth
- Empty the dust cup after every use.
- Clean the filter monthly if you vacuum a lot, or at least every 3 months otherwise.
- Check the brush roll for tangles weekly – even a few strands can affect performance.
- Occasionally, wipe down the vacuum body and attachments.
- Store it in a dry area – moisture and vacuums do not mix.
Even if you do all these, don’t be surprised if some stubborn odor or blockage sneaks in. Shark vacuums are great, but they’re not magic. A little regular care goes a long way.
Common Mistakes People Make
- Rushing the drying process – putting a wet filter back in can ruin it.
- Ignoring small tangles – tiny threads on the brush roll eventually choke the vacuum.
- Not checking attachments – even minor blockages can reduce suction.
- Using harsh cleaners – chemicals can degrade plastic or filters.
Quick Reference Table
| Part | Cleaning Frequency | Method |
|---|---|---|
| Dust Cup | After every use | Empty + rinse |
| Foam Filter | Monthly | Rinse gently |
| Felt Filter | Monthly | Tap or rinse if allowed |
| Brush Roll | Weekly | Remove tangles, wash if removable |
| Hose | Monthly | Check blockages, wipe interior |
| Exterior | Monthly | Wipe with damp cloth |
Final Thoughts
Learning how to clean Shark vacuum cleaner is kinda like taking care of a pet you can’t cuddle. It needs attention, patience, and the right little tools. But once you get the routine down, your vacuum will thank you with solid suction, cleaner floors, and fewer “why does it smell like feet in here” moments. It may seem tedious at first, but honestly, once you get into the rhythm, it’s less like a chore and more like a weird little ritual that makes your home feel nicer.
A little care goes a long way, and your Shark vacuum cleaner will reward you by working like the $300 piece of tech it is supposed to be. And trust me, the sound of a vacuum actually working properly is weirderly satisfying – like your home just leveled up.